Wednesday, March 13, 2019

Creating Reports in Oracle E-Business Suite Using XML Publisher

Creating Reports in Oracle E-Business Suite Using XML Publisher

XML Publisher, which is also called Oracle Business Intelligence Publisher (BI Publisher), is a template-based reporting tool that leverages standard technologies for data extraction and display. Business users can build the layout and rules for the report themselves by using common desktop tools. Development engineers can concentrate on extracting data in the most efficient manner. Deployment time is faster. Also, business users with minimal training can design templates and reports based on the data sources provided by engineers, thus greatly reducing the cost of ownership.

In the following example, we will see how to create a layout template for the Receivables Customer Balance Letter (ARXCOBLX). We create a letter that shows the outstanding balance for a customer. 
This letter contains a table of all unpaid or partially paid invoices. We will then deploy the template to the Template Manager, run the report, and generate an output. 
This covers: 
Data: We use a predefined Oracle Reports report from the Receivables, Vision Operations (USA) application. This report is used as a data model for your report and generates data in XML format. We use this XML file to create your layout template.
Layout Templates: We will create a layout template for this report by using the BI Publisher Template Builder, an Add-in for Microsoft Word. BI Publisher Template Builder is one of the components that is installed with the BI Publisher Desktop. 
Template Manager: We will deploy our layout template by using the Template Manager in E-Business Suite. We can deploy multiple templates for the same report, run the report in E-Business Suite with any one of the layout templates, and then view the output. 
Delivery: We can generate the report output in E-Business Suite with our template and deliver it via multiple delivery channels based on the choice of the end user or the recipient by e-mail. we will cover this in the next tutorial.

Prerequisites:
1. The E-Business Suite 11.5.10 instance or higher. Example is based on the E-Business Suite R12 instance.
Using following responsibilities: 
- XML Publisher Administrator 
- System Administrator 
- Receivables, Vision Operations (USA) 
2. Java Runtime Environment (JRE) 1.4. and Microsoft .Net 2.0 on your Windows PC
3. Microsoft Word 2000 or Microsoft Word 2003 on your Windows PC

Install Oracle XML Publisher Desktop/BI Publisher Desktop
We can use XML Publisher Desktop / Template Builder 5.6.3 or any later versions. BI Publisher Desktop can be download from here
1. Download the BI Publisher Desktop by clicking the BI Publisher Desktop Version.exe for Windows link on the page link given above. Download and save anywhere (for example, in C:\temp). After the download is complete, install BI Publisher Desktop. Open File Explorer and navigate to the download directory (for example, C:\temp). Double-click BIPublisherDesktop.exe to start the installation process. A set of installation wizard pages guide you through the installation process.
 2. Select English, and then click Next. 


3. On the InstallShield Wizard screen, click Next. 
 

 4. Enter the location where you want to install BI Publisher Desktop and click Next.  


The installation proceeds:


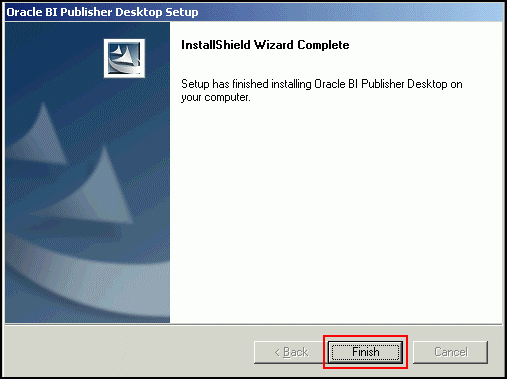
5. When the installation is complete, click Finish. 
 
6. After BI Publisher Desktop is installed, open Microsoft Word. Note a menu item named Oracle BI Publisher on the menu bar and a new toolbar. 

Set the Oracle Reports Report Output to XML
The first task is to set the Oracle Reports report to generate XML output. You do this as the System Administrator in the definition of the Concurrent Program for the Oracle Reports report.
1. Log in to your E-Business Suite instance.
  
2. Open the System Administrator responsibility. 

 
3. Click the Define link from Concurrent: Program.
 
4. The Concurrent: Programs window appears. Select View > Query By Example > Enter from the Applications menu. Note that the color of the fields change to blue. You can also press [F11] to enter the query mode. 


5. In the Short Name field, enter ARXCOBLX. ARXCOBLX is the short name for the report. You should always use this name to reference the report. Change the Output Format field to XML by using the drop-down list. 
 

6. Run the query through Concurrent Programs. Select View > Query By Example > Run from the Applications menu to run the query. Alternatively, you can press [CTRL] + [F11] to run the query. 


7. After the query is executed, note that the rest of the fields get filled up automatically. Save the results by clicking the Save icon from the Applications menu.
 

Use Concurrent Manager to Create a Sample XML File
To generate a sample XML data file for the Customer Open Balance Letter, you need to submit a request through Concurrent Manager to run the report and create the output in XML format.

1. Go to the E-Businee Suite's Home page and change the responsibility to Receivables, Vision Operations (USA). Click Receivables, Vision Operations (USA) in the left navigation bar. 
   
2. Scroll down and click Run link from Control : Requests to open the request submission form.

3. The Submit a New Request dialog box appears. Select the Single Request option and click OK.

4. In the Submit Request dialog box, click the ellipses (...) next to the Name field.
 
5. The Reports search dialog box appears. Enter customer% and click Find. 
 
6. Select Customer Open Balance Letter from the list and click OK. 


 7. Click on the Parameters field to enter other values for the report, a Parameters dialog box comes up. In the As of date field enter: 01-Jan-2006.  

8. To enter the customer name, scroll to the right and click the ellipses (...) next to the Customer Name From field. In the Longlist dialog box, enter a% and click OK. 

9. Select A. C. Networks from the list and click OK. 
 
10. Note that A. C. Networks is entered in both the Customer Name From and Customer Name To fields. Click OK.


11. To submit the request, click Submit.
 
12. From the Applications menu, select View > Requests.
13. In the Find Requests window, select the All My Requests option and click Find. 
14. In the Requests window, search for your Job ID and check the status of the job. If the job is completed, click the View Output button. 

15. View the report in a browser. Because no template is associated with the report and you have requested an XML output, the report is an XML file. Save the XML file as customer.xml in your local drive.
 
 
Create an RTF Template
BI Publisher supports several types of templates. RTF templates are the most common and provide a wide range of output formats. We can use the BI Publisher Template Builder, which is an Add-in to Microsoft Word, to build an RTF template.We can use an existing RTF template file named Balance Letter Start.rtf. Download the starting template from here and save the RTF file in C:\temp. 

Load XML Data in a Word Template
Open a layout template and load the XML data. 
To load the XML data, perform the following steps: 
1. Open the file named Balance Letter Start.rtf in Microsoft Word. This is a predefined template. In this template, the header, footer, Oracle logo, and page numbering in the header is added. It also has a text in the footer. These are done using the Microsoft Word features. Any image can be inserted by using the Insert > Picture > From File from the Microsoft Word menu.

2. Select Data > Load XML Data from the BI Publisher menu.

3. In the Please select XML data dialog box, select the customer.xml file and click Open.
 
4. When the "Data loaded successfully" message appears, click OK.
 

Insert Form Fields
To insert form fields in the customer letter, perform the following steps: 
  
1. Select <INSERT ADDRESS HERE> and select Insert > Field from the BI Publisher menu.
 
  
2. Select Customer Name from the Field dialog box and click Insert.

3. Place the cursor in the line below Customer Name and select Address Line 1. Click Insert. Similarly, insert Address Line 3, Address Line 4, City, State, and Country. Close the Field dialog box.
 
4. Select <INSERT DATE HERE>. Select Insert > Field from the BI Publisher menu. Select C As of Date Display and click Insert.


5. Similarly, change the other fields as follows:
<INSERT CURRENCY CODE HERE> as TRX CURRENCY CODE
<AMOUNT> as C_INV_OPEN_BALANCE

6. Click File>Save from Microsoft Word menu to save the template. Click Preview>PDF from BI Publisher menu to view the report in PDF.


Create a Table
In this letter, you create a table of all unpaid or partially paid invoices. To create the table, perform the following steps:
1. Select the text <INSERT TABLE OF INVOICES HERE> in the layout template. Select Insert > Table Wizard from the BI Publisher menu.

2. In the Table Wizard window, select the Table option and click Next.
 

3. For Grouping Field, select the last item with List of Invoices from the drop-down list. Click Next.

 4. Select the fields shown in the image below and move them to the right column. Click Next.


5. In the Group By window, click Next. There is no group for the data in the letter. 


6. In the Sort By window, select Transaction Date from the drop-down list. Let the sort be Ascending order, which is the default. Click Finish.


7. Your template should appear similar to the image below. Use the Microsoft Word features to modify the look and feel, and adjust the columns of the template.


8. Use the Microsoft Word features to change the column headings as shown.


9. Enter a new row at the end of the table to display the total for Amount Due. Place the cursor inside the last row and from the menu, select Table > Insert > Rows Below. Enter Total for the Amount column in the new row.


10. Add the total of Amount Due for the customer in the last column. Click anywhere in the empty cell to the right of the Total cell. Select Insert > Field. 

11. In the Field window, select Trans Amount Remaining and sum from the Calculation drop-down list. Click Insert, and then click Close.


12. Table should appear similar to the image below:


13. For better reading, change the data type and format for the date and amount fields. Select and double_click the C_AS_OF_DATE_DISPLAY field. The Text Form Field Options window appears. Change Type to Date. Change the date format as shown below.


14. Similarly change the format for the Transaction Date column.


15. Select and double-click TRANS_AMOUNT. Select the Number format $#,##0.00 and edit it as shown below. Enter $999 in the Default number field. Click OK. Similarly, change the format for Trans Amount Remaining and sum Trans Amount Remaining.


 16. Select TRX_NUMBER and click the Center align icon on the Microsoft Word toolbar. Similarly, center-align the Date field and right-align all the amount fields.


17. Save the template as Balance Letter - Template.rtf and preview in PDF format. Select Preview > PDF from the BI Publisher menu. The preview report displays with the sample data.


We can add other Microsoft Word features to the template. 

Create a Data Definition for the Report
To publish report, we must register the data source that would be merged with the template. When we register our layout template file (in the next section), we must assign to it a data definition that exists in the Template Manager. This associates the two at run time. Note that multiple templates can use the same data definition.
To create a data definition, perform the following steps:
1. Log in to E-Business Suite and click XML Publisher Administrator to change to the XML Publisher Administrator responsibility. 


2. Click the Data Definitions link (Data Definition tab for XML Publisher). Click the Create Data Definition button to create a new data definition. 

3. Under Create Data Definition, fill the form as shown below. It is critical that we use the correct short name of the Concurrent Program - ARXCOBLX to correctly link this data definition to the underlying Concurrent Program and Oracle Reports report. For the Name field, we can use whatever we like. In this example, we use "Customer Balance Data Definition." 
Click Apply.


4. We should see a confirmation message. Now we have successfully created the data definition for the Customer Balance Letter.


Use the Template Manager to Upload the Template

1. On the Template tabbed page for XML Publisher, click Create Template.
   
2. Enter the template name as Customer Balance Letter - Template. Select Application name as Receivables using the Lookup icon. Enter code as ARXCOBLX.


3. Click the Lookup icon next to the Data Definition field, enter cust%, and then click Go. Select the Customer Balance Data definition option from the list and click Select.


4. Select the template type as RTF from the Type drop-down list.


5. Now we will upload the template that created in Microsoft Word. To select the template file we created, scroll down to the Template File section. For File, browse and open the file called Balance Letter - Template.rtf.


6. Select the Language as English.


7. Template form should look like below. Click Apply. We should get a message that your template has been created successfully.

  
Run the Report with the Template
1. Change to the Receivables, Vision Operations (USA) responsibility from the E-Business Suite Application Home page. Click Run link from Control : Requests.
 
  
2. The Submit a New Request window appears. Select the Single Request option and click OK.
3. In the Submit Request window, click the ellipses (...). 
4. The Reports search window appears. Enter customer% in the Find field and click Find. 
5. Select Customer Open Balance Letter from the list and click OK.
  
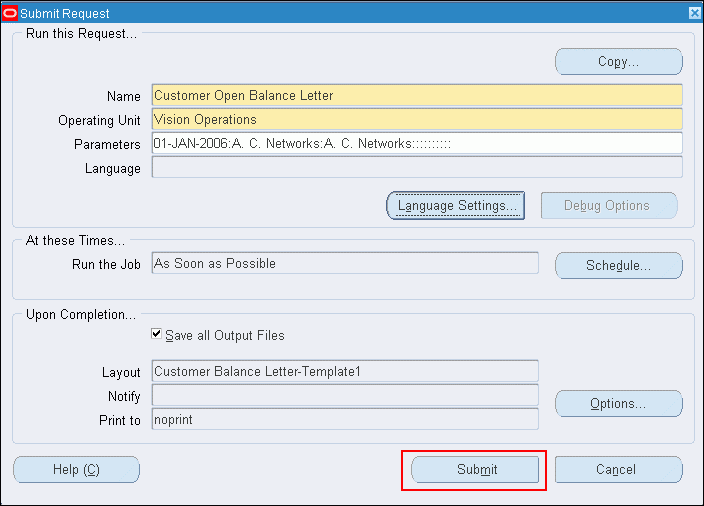
6. Click on the Parameters dialog box, where you will enter other values for the report. In the As of date field enter 01-Jan-2006. 
7. To enter the customer name, scroll right and click the ellipses (...). In the Longlist dialog box, enter a% and click OK.
8. Select A. C. Networks from the list and click OK. 
9. Note that A. C. Networks is automattically entered in both the Customer Name From and Customer Name To fields. Click OK.
10. Note that in the Layout field, the layout template file is listed. Click the Options button to see the other options that you can set after the report is completed. 

11. The Upon Completion.. window appears. In this window, you can specify what actions can be taken after the job is executed. You can notify one or more people about the report. You can send the report to be printed. For the purpose of this tutorial, you do not print it. Click OK.


12. We return to the Submit Request window. Click Submit to execute the request.

13. Note the Request ID that is displayed in the the Decision dialog box and click NO.
 14. From the Applications menu, select View > Requests.
 15. In the Find Requests window, select the All My Requests option and click Find. 
 16. In the Requests window, search for Job ID and check the status. If the job is completed, click the View Output button. 


17.. Click the View Output button to view the report in a browser. Note that the report is displayed with the layout in the template. We can also associate other templates with the same data definition.


Changing EBS Datasource APPS Password in OBIA/BIAPPS

Changing EBS Datasource APPS Password in OBIA/BIAPPS

Step 1 Drop and recreate Database Link with New APPS Password
Drop DBLINK
DROP PUBLIC DATABASE LINK "ERPPROD.WORLD@DSN_90";

Create New DBLINK
CREATE PUBLIC DATABASE LINK "ERPPROD.WORLD@DSN_90"
CONNECT TO APPS
IDENTIFIED BY newpassword
USING 'ERPPROD';

Step 2 Update EBS Datasource with new APPS Password in BI Configuration Manager.
To update the new password in source system (EBS Datasource).
Login to BI Application Configuration Manager  http://bi.mydomain.com:9704/biacm
Click on Define Business Intelligence Applications Instance


Click on Edit Button
Click Next
In the Edit Connection Details, Update new Apps Password and Click on Test
Save and Close the Window

Step 3 Update ODI EBS DataSource with new APPS Password
Login the ODI studio
Update apps password for ODI_DS Data source


Update apps password for ERPPROD Data source


Step 4 Update new APPS Password in Repository (RPD) file
Required for analytics 

Login to BI Administration Tool
Open Repository online

Select Oracle EBS OLTP in the Physical Layer
Right Click on Oracle EBS OLTP and select Properties

Click Yes for Check-Out

Select Oracle EBS OLTP InitBlock Connection Pool and Click Edit Button
Click Yes for Check-Out
Type new apps Password  and click Ok


Changing Weblogic Password in OBIEE

Changing Weblogic Password in OBIEE

1. Go to the WebLogic Administration Console (http://hostname:7001/console).

2. Navigate Security Realm > Users and Groups > weblogic > passwords

3. Change the password for weblogic and save.

4. Navigate bifoundation_domain > Security > EmbeddedLDAP

Press "Lock & Edit."
Check the option "Refresh Replica At Startup" and save.
Press "Activate Changes."

This option "Refresh Replica At Startup" described as "Specifies whether the embedded LDAP server in a Managed Server should refresh all replicated data at boot time. This setting is useful if you have made many changes when the Managed Server was not active, and you want to download the entire replica instead of having the Administration Server push each change to the Managed Server." in the documentation.

5. Stop Admin Server.

6. Delete boot.properties from the following directories.
<MIDDLEWARE_HOME>/user_projects/domains/bifoundation_domain/servers/AdminServer/security
<MIDDLEWARE_HOME>/user_projects/domains/bifoundation_domain/servers/bi_server1/security

7. Create a new boot.properties file and placed under the above directories:
username=weblogic
password=mypassword
(Note: Please, replace "mypassword" with the actual password that you want to set.)
For further information on boot.properties, please check the Note 1265834.1 How To Start WebLogic Admin And OBIEE 11g Managed Servers Without Prompting Administrator Username And Password On Unix Environments.
Once the Admin Server or bi_server1 is started for the first time, credentials in the boot.properties file are automatically encrypted.

8. Start Admin Server. Admin Server has been started with a new password for weblogic.

9. Start bi_server1.

10. Start opmn components.

Reference:
OBIEE 11g: bi_server1 Failed to Start After Changing Weblogic User Password (Doc ID 2223465.1)
OBIA 11g: How to Change BI Applications System Account Passwords (Doc ID 1613764.1)

Backup and Recovery Scenarios

Backup and Recovery Scenariosa) Consistent backups

A consistent backup means that all data files and control files are consistent  to a point in time. I.e. they have the same SCN. This is the only method of  backup when the database is in NO Archive log mode.

b) Inconsistent backups
An Inconsistent backup is possible only when the database is in Archivelog mode.  We must apply redo logs to the data files, in order to restore the database to a consistent state.  Inconsistent backups can be taken using RMAN when the database is open.
Inconsistent backups can also be taken using other OS tools provided the tablespaces (or database) is put into backup mode.
ie: SQL> alter tablespace data begin backup;
    SQL> alter database begin backup; (version 10 and above only)


c) Database Archive mode
The database can run in either Archivelog mode or noarchivelog mode.  When we first create the database, we specify if it is to be in Archivelog  mode. Then in the init.ora file we set the parameter log_archive_start=true  so that archiving will start automatically on startup.
If the database has not been created with Archivelog mode enabled, we can  issue the command whilst the database is mounted, not open.
SQL> alter database Archivelog;.
SQL> log archive start
SQL> alter database open;
SQL> archive log list
This command will show us the log mode and if automatic archival is set.
 

d) Backup Methods
Essentially, there are two backup methods, hot and cold, also known as online and offline, respectively. A cold backup is one taken when the database is shutdown. The database must be shutdown cleanly.  A hot backup is on taken when the database is running. Commands for a hot backup:
For non RMAN backups:
1. Have the database in archivelog mode (see above)
2. SQL> archive log list
--This will show what the oldest online log sequence is. As a precaution, always keep the all archived log files starting from the oldest online log sequence.
3. SQL> Alter tablespace tablespace_name BEGIN BACKUP;
or SQL> alter database begin backup (for v10 and above).
4. --Using an OS command, backup the datafile(s) of this tablespace.
5. SQL> Alter tablespace tablespace_name END BACKUP
--- repeat step 3, 4, 5 for each tablespace.
or SQL> alter database end backup; for version 10 and above
6. SQL> archive log list
---do this again to obtain the current log sequence. make sure that we have a copy of this redo log file.
7. So to force an archived log, issue
SQL> ALTER SYSTEM SWITCH LOGFILE
A better way to force this would be:
SQL> alter system archive log current;
8. SQL> archive log list
This is done again to check if the log file had been archived and to find the latest archived sequence number.
9. Backup all archived log files determined from steps 2 and 8.
10. Back up the control file:
SQL> Alter database backup controlfile to 'filename'
For RMAN backups:
see Note.<>  RMAN - Sample Backup Scripts 10g
or the appropriate RMAN documentation.


e) Incremental backups
These are backups that are taken on blocks that have been modified since the last backup. These are useful as they don't take up as much space and time. There are two kinds of incremental backups Cumulative and Non cumulative.
Cumulative incremental backups include all blocks that were changed since the  last backup at a lower level. This one reduces the work during restoration as  only one backup contains all the changed blocks.
Noncumulative only includes blocks that were changed since the previous backup  at the same or lower level.
Using rman, we issue the command "backup incremental level n"
Oracle v9 and below RMAN will back up empty blocks, oracle v10.2 RMAN will not back up empty blocks


f) Support scenarios
When the database crashes, we now have a backup. We restore the backup and
then recover the database. Also, don't forget to take a backup of the control
file whenever there is a schema change.

RECOVERY SCENARIOS

Note: All online datafiles must be at the same point in time when completing recovery;
There are several kinds of recovery we can perform, depending on the type of  failure and the kind of backup we have. Essentially, if we are not running in archive log mode, then we can only recover the cold backup of the database and we will lose any new data and changes made since that backup was taken. If, however, the database is in Archivelog mode we will be able to restore the database up to the time of failure. There are three basic types of recovery:


1. Online Block Recovery.
This is performed automatically by Oracle.(pmon) Occurs when a process dies  while changing a buffer. Oracle will reconstruct the buffer using the online  redo logs and writes it to disk.


2. Thread Recovery.
This is also performed automatically by Oracle. Occurs when an instance  crashes while having the database open. Oracle applies all the redo changes  in the thread that occurred since the last time the thread was checkpointed.


3. Media Recovery.
This is required when a data file is restored from backup. The checkpoint count in the data files here are not equal to the check point count in the  control file.
Now let's explain a little about Redo vs Undo.
Redo information is recorded so that all commands that took place can be  repeated during recovery. Undo information is recorded so that we can undo changes made by the current transaction but were not committed. The Redo Logs  are used to Roll Forward the changes made, both committed and non- committed  changes. Then from the Undo segments, the undo information is used to
rollback the uncommitted changes.
Media Failure and Recovery in Noarchivelog Mode
In this case, our only option is to restore a backup of Oracle files. The files we need are all datafiles, and control files.  We only need to restore the password file or parameter files if they are lost or are corrupted.
Media Failure and Recovery in Archivelog Mode
In this case, there are several kinds of recovery we can perform, depending on what has been lost.


The three basic kinds of recovery are:
1. Recover database - here we use the recover database command and the database must be closed and mounted. Oracle will recover all datafiles that are online.


2. Recover tablespace - use the recover tablespace command. The database can be open but the tablespace must be offline.


3. Recover datafile - use the recover datafile command. The database can be  open but the specified datafile must be offline.
Note: We must have all archived logs since the backup we restored from,  or else we will not have a complete recovery.


a) Point in Time recovery:
A typical scenario is that we dropped a table at say noon, and want to recover it. We will have to restore the appropriate datafiles and do a point-in-time  recovery to a time just before noon.
Note: We will lose any transactions that occurred after noon.  After we have recovered until noon, we must open the database with resetlogs. This is necessary to reset the log numbers, which will protect the database  from having the redo logs that weren't used be applied.
The four incomplete recovery scenarios all work the same:
Recover database until time '1999-12-01:12:00:00';
Recover database until cancel; (we type in cancel to stop)
Recover database until change n;
Recover database until cancel using backup controlfile;
Note: When performing an incomplete recovery, the datafiles must be online. Do a select * from v$recover_file to find out if there are any files  which are offline. If we were to perform a recovery on a database which has  tablespaces offline, and they had not been taken offline in a normal state, we  will lose them when we issue the open resetlogs command. This is because the data file needs recovery from a point before the resetlogs option was used.


b) Recovery without control file
If we have lost the current control file, or the current control file is  inconsistent with files that we  need to recover, we need to recover either by using a backup control file command or create a new control file. We can also recreate the control file based on the current one using the  'SQL> backup control file to trace' command which will create a script for we to  run to create a new one.  Recover database using backup control file command must be used when using a  control file other that the current. The database must then be opened with
resetlogs option.


c) Recovery of missing datafile with rollback segments
The tricky part here is if we are performing online recovery. Otherwise we can just use the recover datafile command. Now, if we are performing an  online recovery, we will need to create a new undo tablespace to be used.  Once the old tablespace has been recovered it can be dropped once any uncommitted  transactions have rolled back.


d) Recovery of missing datafile without undo segments
There are three ways to recover in this scenario, as mentioned above.
1. recover database;
2. recover datafile 'c:\orant\database\usr1orcl.ora';
3. recover tablespace user_data;


e) Recovery with missing online redo logs
Missing online redo logs means that somehow we have lost our redo logs before  they had a chance to archived. This means that crash recovery cannot be  performed, so media recovery is required instead. All datafiles will need to be restored and rolled forwarded until the last available archived log file is applied. This is thus an incomplete recovery, and as such, the recover
database command is necessary.
As always, when an incomplete recovery is performed, we must open the database with resetlogs.
Note: the best way to avoid this kind of a loss, is to mirror online log files.


f) Recovery with missing archived redo logs
If archives are missing, the only way to recover the database is to restore from latest backup. We will have lost any uncommitted
transactions which were recorded in the archived redo logs. Again, this is why  Oracle strongly suggests mirroring online redo logs and duplicating copies  of the archives.


g) Recovery with resetlogs option
Reset log option should be the last resort, however, as we have seen from above, it may be required due to incomplete recoveries. (recover using a backup control file, or a point in time recovery). It is imperative that we backup up the database immediately after we have opened the database with reset logs.  It is possible to recover through a resetlogs, and made easier with Oracle V10, but easier
to restore from the backup taken after the resetlogs


h) Recovery with corrupted undo segments.
If an undo segment is corrupted, and contains uncommitted system data we may not be able to open the database.
The best alternative in this situation is to recover the corrupt block using the RMAN blockrecover command next best would be to restore the datafile from backup and do a complete recovery.
If a backup does not exist and If the database is able to open (non system object) The first step is to find out what object is causing the rollback to appear corrupted. If we can determine that, we can drop that object.
So, how do we find out if it's actually a bad object?
1. Make sure that all tablespaces are online and all datafiles are online. This can be checked through via the v$recover_file view.


2. Put the following in the init.ora:
event = "10015 trace name context forever, level 10"
This event will generate a trace file that will reveal information about the  transaction Oracle is trying to roll back and most importantly, what object  Oracle is trying to apply the undo to.
Note: In Oracle v9 and above this information can be found in the alert log.
Stop and start the database.


3. Check in the directory that is specified by the user_dump_dest parameter (in the init.ora or show parameter command) for a trace file that was  generated at startup time.


4. In the trace file, there should be a message similar to: error recovery tx(#,#) object #.
TX(#,#) refers to transaction information.
The object # is the same as the object_id in sys.dba_objects.


5. Use the following query to find out what object Oracle is trying to perform recovery on.
select owner, object_name, object_type, status
from dba_objects where object_id = <object #>;


6. Drop the offending object so the undo can be released. An export or relying on a backup may be necessary to restore the object after the corrupted undo segment is released.
 

i) Recovery with System Clock change.
We can end up with duplicate timestamps in the datafiles when a system clock  changes. This usually occurs when daylight saving comes into or out of the picture. In this case, rather than a point in time recovery, recover to a specify log or SCN
 

j) Recovery with missing System tablespace.
The only option is to restore from a backup.
 

k) Media Recovery of offline tablespace
When a tablespace is offline, we cannot recover datafiles belonging to this  tablespace using recover database command. The reason is because a recover database command will only recover online datafiles. Since the tablespace is  offline, it thinks the datafiles are offline as well, so even if we  recover database and roll forward, the datafiles in this tablespace will not be touched.  Instead, we  need to perform a recover tablespace command. Alternatively, we could restored the datafiles from a cold backup, mount the database and select  from the v$datafile view to see if any of the datafiles are offline. If they are, bring them online, and then we can perform a recover database command.
 

l) Recovery of Read-Only tablespaces
If we have a current control file, then recovery of read only tablespaces is  no different than recovering read-write files. The issues with read-only tablespaces arise if we have to use a backup control file. If the tablespace is in read-only mode, and hasn't changed to read-write since the last backup, then we will be able to media recovery using a backup control file by taking the tablespace offline. The reason here is that when we are using the backup control file, we must open the database with resetlogs. And we know that Oracle wont let us read files from before a resetlogs was done. However, there is an exception with read-only tablespaces. We will be able to take the datafiles online after we have opened the database.
When we have tablespaces that switch modes and we don't have a current control file, we should use a backup control file that recognizes the tablespace in  read-write mode. If we don't have a backup control file, we can create a new  one using the create controlfile command.  Basically, the point here is that we should take a backup of the control file every time we switch a tablespaces mode.


Some Tips About FNDLOAD

Data Synchronization  Data Synchronization is a process in which some setup data would be synchronized, and this would be more important w...